
Work has been steadily progressing on the waterproofing-the-back-of-the-main-building project started back in January.
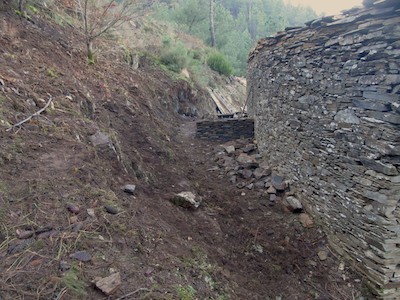
First conceived of as a covered corridor along the back of the building with a bit of space for outdoor clothes/shoes and a small toilet, its primary purpose was to prevent rainwater falling on the ground immediately behind the building and running straight down the back walls of bedrock in – and into – the two lower rooms. With a roof to keep the ground dry, we would then be able to dig a drain into the bedrock itself behind the covered area to catch runoff from both the roof and slope (surface and subsurface) and carry it away from the back of the building before it reaches it.

By doing this, I wanted to avoid all that stuff with deep digging, tanking with damp proof membranes and concrete, etc, that tends to be the modern solution to water ingress in buildings built into slopes. Stopping the water reaching the back of the building in the first place seemed a much simpler solution. It keeps everything breathing and flowing rather than backing up behind a mass of concrete and plastic which, in any case, would be a mission to accomplish given that the walls are built straight onto bedrock which itself forms part of the structure, so no isolation of the building from its immediate environment is even possible.
And if, after our efforts, some water does work its way right down through the bedding planes of the schist and eventually finds its way into the rooms, then it would be so small an amount as to allow simple evaporation to take care of it. We might even be able to use it to our advantage – for instance, in the storeroom where evaporation from the rock surface would provide a cooling effect and a level of humidity conducive to storing certain root vegetables, so the plan is to build root vegetable storage boxes along the back wall, with shelving for things that prefer a dryer atmosphere kept to the opposite side of the room.
But having thought it all through and arrived at what felt like a reasonably watertight theory, it kind of kept growing …
When it came to construction materials, I started thinking of a living roof covering, and from that it seemed logical to extend the roof right back to meet the slope, so slope and roof would eventually become visually indistinguishable. And to put in 2 drains for good measure: a gully where the roof meets the slope, and one at floor level beneath to catch what might manage to find a way through.
Once work got underway, taking the slope back to bedrock in order to cut in the lower drain opened up even more space. So we’ve ended up with an area big enough for a lot more than originally planned … log storage for stoves in the two upper rooms, shower as well as toilet, generous area for outdoor gear, space for a methane digester to supply a small amount of gas for cooking when we only want to boil a kettle … the possibilities are many.

The schist floor being laid

First eucalyptus timber supports and main beams go up
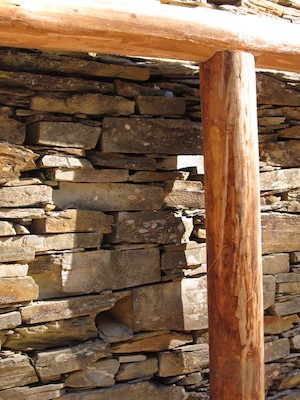
The beauty of plain round pole timbers against stacked dry stone … though not for long: this wall will be insulated with woodchip light clay and lime plastered between the timbers to enclose the wall’s thermal mass in the interior of the building.

Mid February and the early morning sun highlights the concrete pillars cast to support the main beams where there isn’t bedrock for the purpose. Wayne starts building the rear schist wall between rock outcrops.

First set of rafters and purlins. The entire supporting structure is being constructed in eucalyptus cut from our own woods (with a few rafters kindly donated by the previous owner of this quinta who still owns some woodland next to ours).

The rear schist wall meets the wall plate
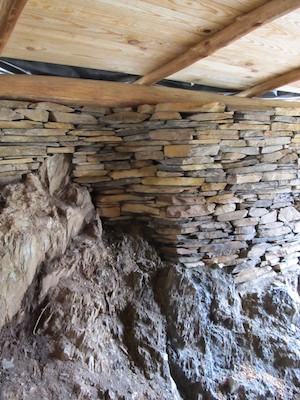
Walls curve to follow the line of the bedrock

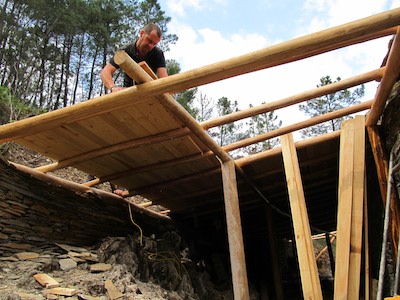
The first planks go down

A temporary waterproof covering gives a sense of the enclosed space. About a third of the way along now.

João linseed oiling the timbers. All timbers were first treated with borax (disodium octaborate tetrahydrate, not sodium tetraborate decahydrate) and will have 2 coats of linseed oil.
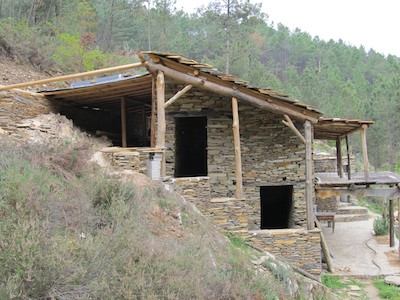
One big shed!
Jonny laying planks
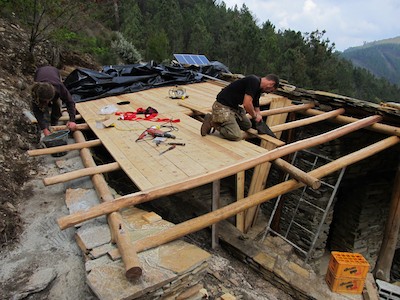
Last of the full length sections
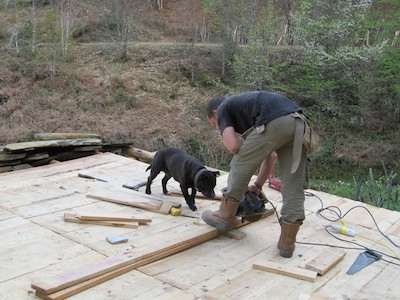
Max, joiner’s apprentice

Nelly’s new look-out post

Planking complete

Huge thanks to Jonny, Wayne, Lester and João for great work and equally great craic. Building should always be such fun! The only trouble is, now we’ve created this beautiful space, it seems a shame to start filling it with walls and divisions …
But plenty of time to think about that yet. The next stage is to place the final upright to support the purlins, complete the drains and check their run, install the lighting system – PET water bottles set into upstands in the roof – lay the waterproof membranes, install roof drainage and containing barge boards and finally lay the substrate for the living roof.